
A mild, nutty tasting vegetable, sometimes resembling fresh corn, yellow squash is a summer squash, a subset of squashes harvested when immature, while the rind is tender. Unlike winter squashes, which grow in a rambling fashion, yellow squash is a bushy plant. Also unlike winter squashes, which are harvested after their skin has thickened and can therefore be stored for months, yellow squash must be eaten within a week after picking.
There are three types of yellow squash: scallop or patty pan, crookneck and straightneck. All three varieties are easy to grow, even during Central Texas’ relentless summers, and only a few healthy plants produce abundant yields. Yellow squash can be sown from mid-March through April for an early summer harvest and from late-July through August for a fall harvest. Below are tips for how to grow this tasty vegetable.
1) Work plenty of compost or well-rotted manure into your beds.
2) Plant seeds one inch deep and space them according to seed packet instructions (usually 24 to 36 inches apart with three seeds in each hole). Water deeply. Seeds will sprout in six to 12 days.
3) Water daily until plants have formed their first true leaves. Thin plants as they grow so each has two square-feet of space.
4) Water deeply once or twice a week or whenever the soil is dry four inches down. A steady water supply is necessary for good fruit. Squash leaves are prone to powdery mildew, so water the soil and not the leaves. To prevent the soil from drying out, mulch with leaves, pine needles or soft wood mulch. It is normal for plants to wilt midday. Once the sun sets, they perk back up.
5) Harvest when squash are small and tender. Pick elongated varieties when they are six to eight inches long. Harvest scallop types when they are three to four inches in diameter. Do not allow summer squash to become large and hard because they sap strength from the plant that could be used to produce more young fruit. Pick oversized squash and compost them. Because summer squash develop rapidly after pollination, you may need to harvest every day or other day.
A note on squash vine borers: If your squash plants suddenly wilt and you see holes in their stems, you likely have squash vine borers, a moth whose larvae feed off squash stems. To guard against this common pest, sow early in the summer, and don’t plant squash in the same beds for two consecutive years (borers overwinter in cocoons in the soil). Row covers help prevent moths from laying eggs. You can also plant fennel, dill and cilantro near your squash and let these plants flower. This will attract parasitic wasps, which feed off borers. If you catch borers VERY early, you can remove them. Slit the lower stem lengthwise with a sharp knife, remove the larva by hand, then cover the slit with moist soil to promote the formation of secondary roots.
Since the heat is ramping up, we’re sharing this salad, which can be eaten now with yellow squash available from your garden or at the SFC Farmers’ Markets, or save the recipe for your fall harvest.
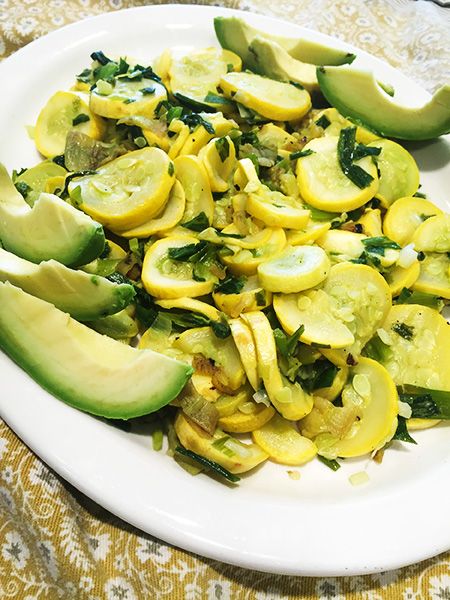
Summer Squash and Avocado Salad
Ingredients
- 6 small summer squash, cut into ¼ inch rounds
- 2 bunches green onions, finely chopped
- 2 tablespoons olive oil, divided
- 1 avocado, cut into medium-sized pieces
- 2 Anaheim Hatch or green chile peppers, roasted*, peeled and chopped or 1 (4-oz.) can chopped green chilies
- Juice of 1 lemon
- Salt and pepper to taste.
Instructions
Heat a large skillet on medium heat.
Add 1 tablespoon of oil to the skillet.
Sauté the squash and green onions until squash is just tender.
Remove from heat and refrigerate for at least 1 hour.
In a bowl, combine squash, green onions, and avocado.
Add chile peppers, lemon juice, and 1 tablespoon of olive oil. Toss lightly.
Add a pinch of salt and pepper to taste.
*To roast fresh chiles or bell peppers, put them directly over a gas burner, on a grill or on a baking sheet on the top rack of an oven, and set the heat to broil. Turn the peppers once the skin is blackened and begins to blister, roasting all sides evenly. Put the roasted peppers in a sealed plastic bag or bowl with a lid for 10-15 minutes, then peel the skin off with your fingers (don’t rinse chiles in water).
Sustainable Food Center’s Fall gardening and cooking class schedule is now available! http://sustainablefoodcenter.org/get-involved/classes-events